Setting Up the Development Environment
1 Prerequisites
To develop Java plugins for publishing server, you need:
- Eclipse IDE with ISON plugin installed - See ISON Eclipse Plug-In User Guide for installation and update instructions
- Access to a publishing server instance with Payara/Glassfish application server
- JDK (Java Development Kit)
2 Development Approaches
There are two approaches to setting up your development environment:
2.1 Devstack (All-in-One)
The devstack bundles everything needed for plugin development in a single package:
- JDK, Payara application server, MySQL database
- Eclipse with ISON pre-installed and pre-configured
- Publishing server instance running locally
Devstack folder structure:
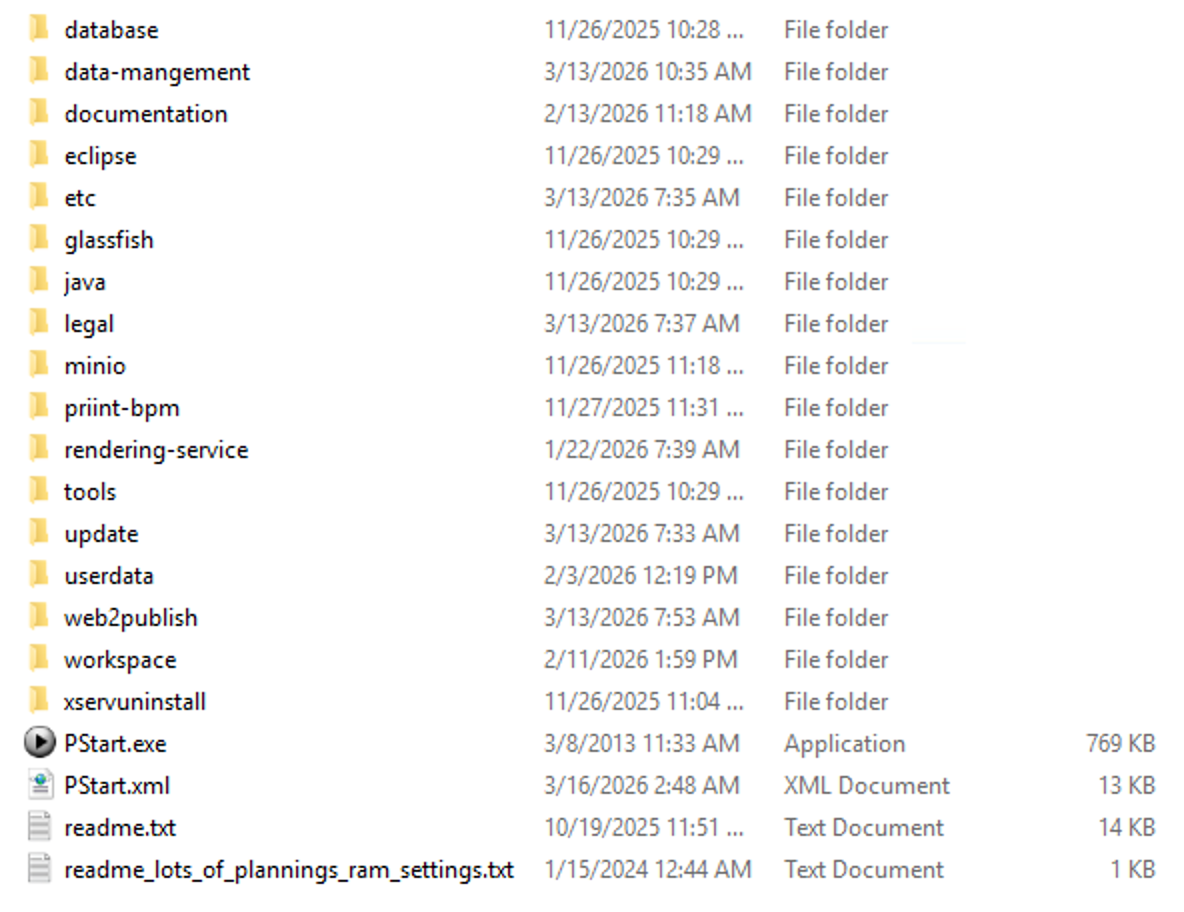
How to use:
- Install devstack on your Windows machine
- Execute
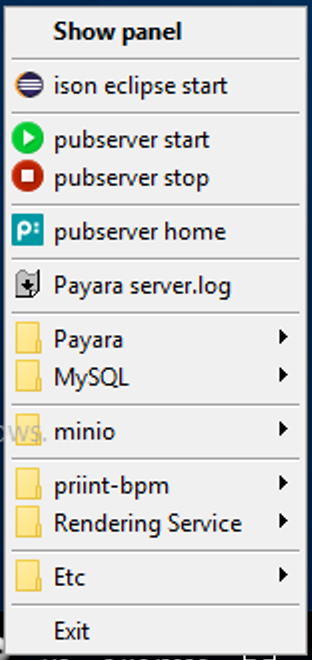
PStart.exeto start the system tray menu - Launch Eclipse/ISON, application server, and database from the tray menu
- Skip to Section 3: Eclipse Configuration below
PStart menu:
2.2 Professional Development Setup
For multi-developer teams and production environments, use a separated approach:
- Install Eclipse and ISON separately on your local machine (see Install ISON in Standard Eclipse)
- Connect to remote publishing server instances (Development, Test, Acceptance, Production)
- Use Maven or Gradle for dependency management (instead of Eclipse User Libraries)
- Keep your Eclipse workspace separate from git-versioned project files
- PubServerSDK and related libraries are available in
glassfish/domains/pubserver/libbut are not published to central repositories. Configure them using your build tool's
support for local artifacts or corporate repositories.
Best for: Multi-developer teams, Linux-hosted servers, DTAP workflows (see guide).
Best practices:
- IDE-independent builds: Use
pom.xmlorbuild.gradlefor dependencies, not Eclipse-specific settings - Separate concerns: Git repository for the actual project, Eclipse workspace elsewhere
- Ignore IDE files: Setup
.gitignorewith to ignore IDE specific configuration files
Note: Professional development setups require knowledge of standard Java development tools and practices. Support for configuring professional environments is available through our paid support services.
3 Eclipse Configuration
The following Eclipse configuration steps are conceptually similar for both devstack and professional setups. The examples below reference devstack paths and folders. Professional developers should adapt these steps to their local Eclipse installation and remote application server configuration.
For devstack: These settings are pre-configured but may need to be restored if the workspace is corrupted.
3.1 JDK as Default Java Runtime Environment
Eclipse should use the devstack JDK as the default Java runtime. Check the correct target JDK version for you publishing server by checking the system requirements.
Open Window → Preferences → Java → Installed JREs. Set the devstack JDK as default. If it doesn't exist, add it as a new JRE.
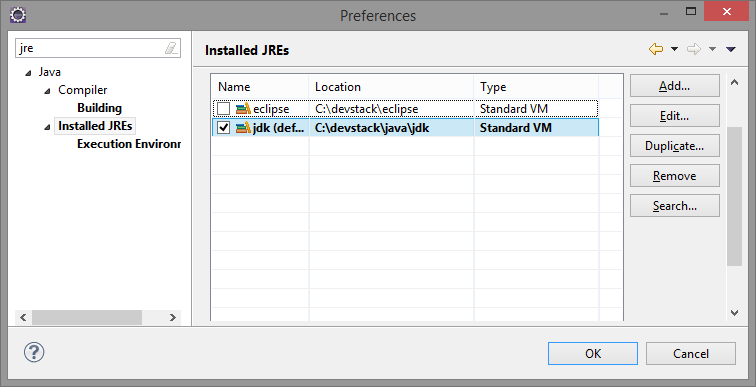
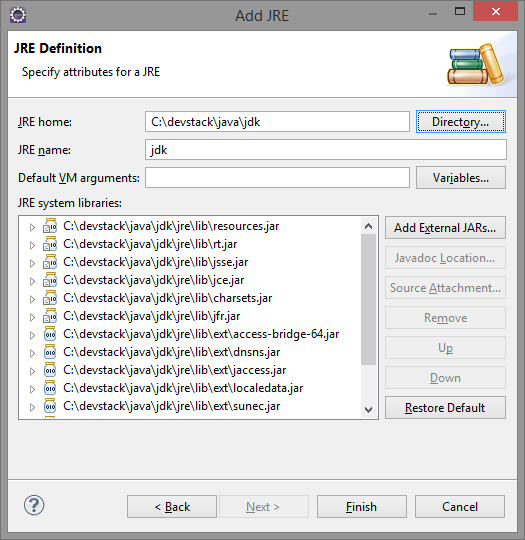
To add a JRE, click Add and set the JRE home to the devstack Java JDK folder. Click Finish to save the new JRE.
3.2 Application Server Reference
The Eclipse workspace normally contains a reference to the devstack application server (Payara or Glassfish) installation. You can verify this by opening the Servers view in Eclipse's JavaEE perspective. If there is no entry or the reference was corrupted, recreate it as follows:
In the Servers view, select Add new server from the context menu. Select the appropriate server type (e.g., "Payara Server" or "Glassfish") and click Next.
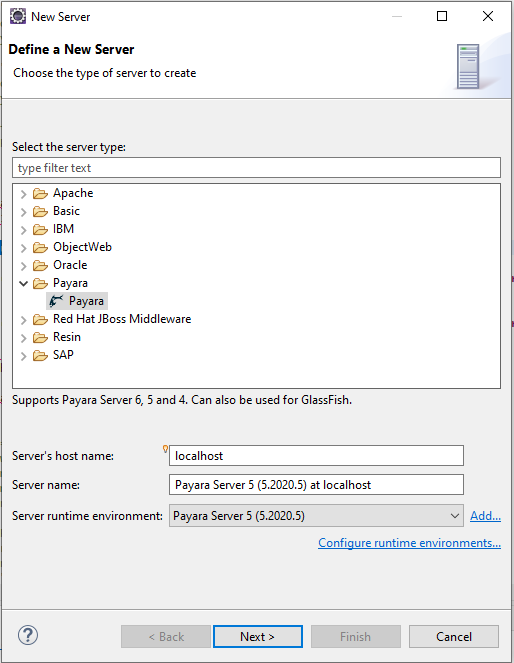
On the next page, select the JDK as the JRE. Set Server Directory to the devstack application server installation (the glassfish folder within your server directory). Click Next.
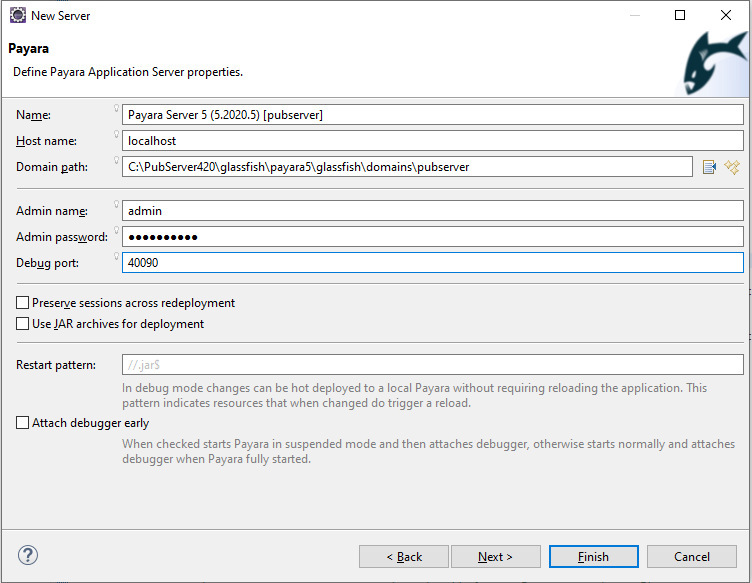
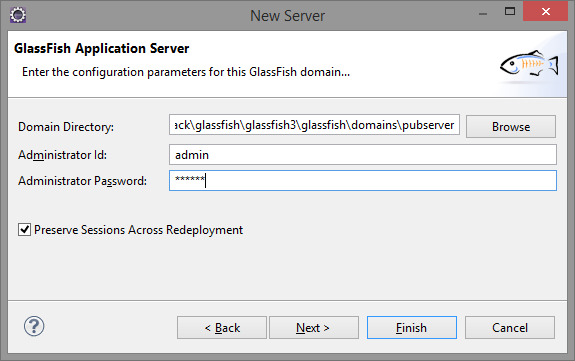
On the next page, change the Domain directory from domain1 to pubserver.
Example path: C:\devstack\glassfish\<server-folder>\glassfish\domains\pubserver
The credentials expected here are the ones set during the initial setup. Click Finish to save the reference.
The Servers view should now contain an entry for the server. You can use the context menu to start and stop the server or inspect deployed applications.

Your plug-in library will be shown as an application here after deployment.
3.3 Common Dependencies - "PubServer Libraries"
The necessary libraries for plug-in development are located in the glassfish/domains/pubserver/lib folder of the application server installation (in devstack, there's also a libraries folder with the same content). These libraries are accessible from all plug-ins and include the publishing server API libraries (most importantly PubServerSDK.jar).
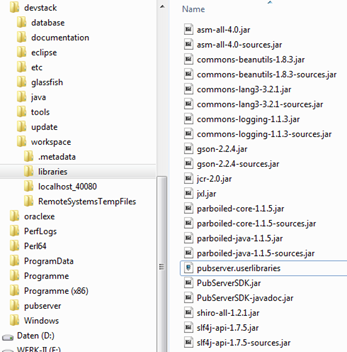
The library list may change with publishing server updates (additions or version updates). All libraries come with either source code (open source libraries) or javadoc files. The libraries are referenced in Eclipse as a "user library" called PubServer Libraries. After a publishing server update, you will need to manually update ISON within Eclipse and update the "PubServer Libraries" references (the JAR files themselves update automatically).
3.4 Updating "PubServer Libraries"
Open Window → Preferences → Java → Build Path → User Libraries. To update, re-import the libraries by clicking the Import button.
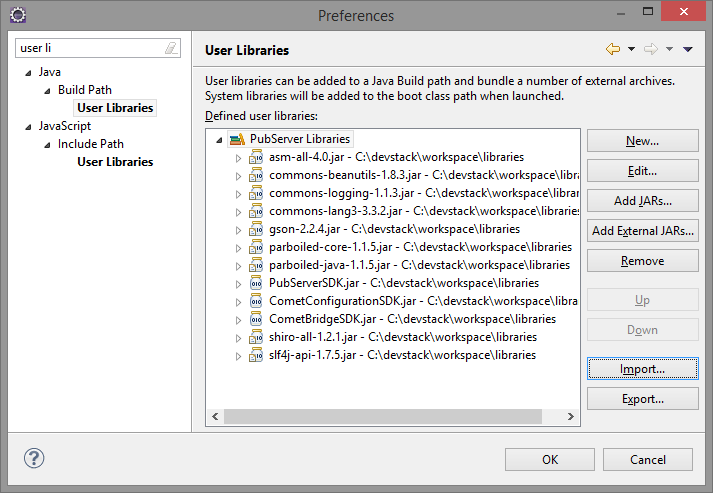
Browse for the file pubserver.libraries in the libraries folder of your workspace. The field may already point to the correct file if pubserver.libraries was the last library added. Click OK and confirm that you want to replace the old version with the new one.

4 Next Steps
Once you have completed the development environment setup, you can proceed to: